Have you ever hosted Thanksgiving, cooked and carved a turkey, and then stared at that giant carcass and thought, “This seems like such a waste,” as you break it up into pieces for your compost? Or has the potential waste ever held you off on cooking a whole bird? I have the recipe for you!
In my household, we usually cook our turkey on a Saturday, which gives us the rest of the weekend to make soup. If you are making your turkey on Thanksgiving Monday (this is a thing here in Canada!), you will have trouble finding time to make soup the following day if you work a 9-5 job like I do. But if you will be home the day after you make your turkey, plan ahead to try this soup stock recipe. It’s super simple, and it’s so satisfying, too!
Step 1: Prepare in advance
It’s important to carve as much of the meat off the turkey carcass as possible the night you serve it. It’s easier to do it, and it also means you can (in my experience) skip trying to fit the whole carcass in your fridge overnight. This leaves room in your fridge for all the other yummy leftovers! Stuffing, and mashed potatoes, and pumpkin pie, and sometimes even jellied salad… my mouth is watering just writing this.
Please note that you probably should store your turkey carcass in the fridge for safety, so please take that as a disclaimer. I’ve never had an issue, but I’m not making any promises either. To my mind, the roasting of the bones the next morning will kill off any growing bacteria but that’s not a guarantee, so please only do what you’re comfortable with!
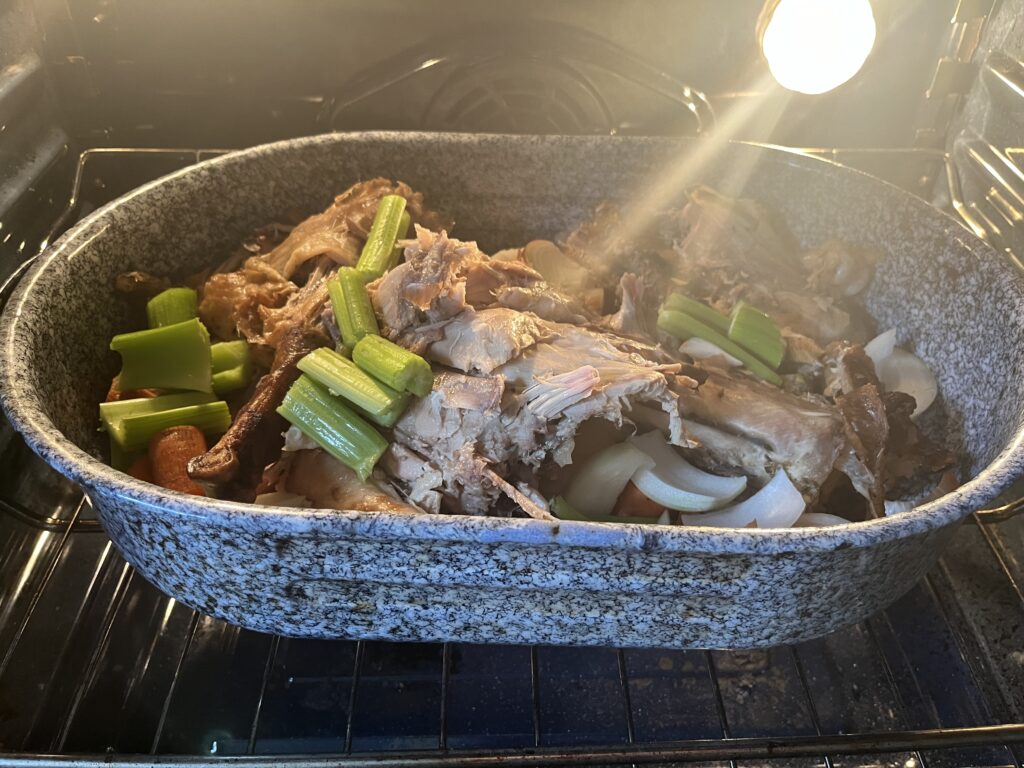
Step 2: Re-roast the bird
I used to make stock from poultry bones all the time, but it never turned out all that flavorful. Then I heard about the idea of roasting the bones before making the stock and let me tell you, this step is an absolute game changer.
I like to keep the turkey carcass in a large roasting pan, with the lid on, in the oven overnight. In the morning, I add some roughly chopped vegetables and roast the bird for about an hour while I make and eat breakfast. Then, I simply take the pan out of the oven, add liquid and some herbs and spices, and let it simmer alllllll day on the stove. It’s a wonderful day to be at home – my house always smells delicious!
Step 3: Make an herb sachet (optional but recommended)
When adding the seasoning, I recommend making a sachet of herbs and spices. You can simply use a drawstring tea bag, or you can make one yourself with cheesecloth and some kitchen twine. Making a sachet allows you to use any format of spices without adding bits of them directly to the broth, which may not provide the texture you want.
You can season your broth however you like. I usually use peppercorns, a couple of bay leaves, and whatever suitable fresh herbs I have on hand (parsley, rosemary, thyme, and/or sage).

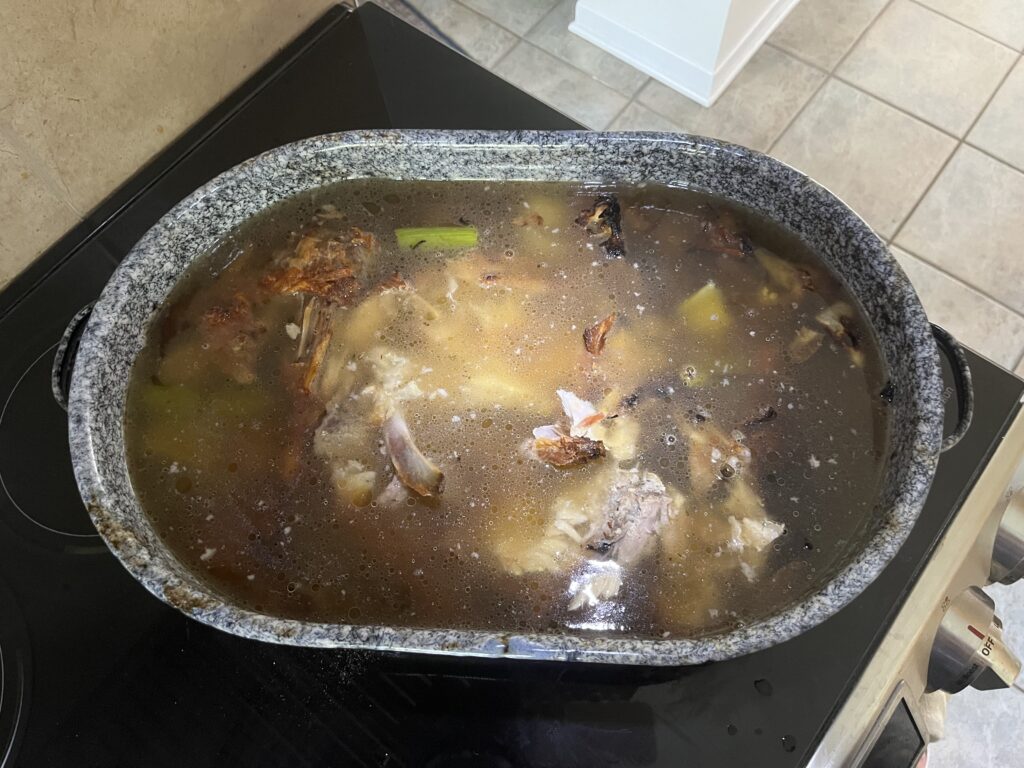
Step 4: Simmer, simmer, simmer, sieve
This is by far the longest step. You’ll need to cover the bones with water, add the herbs, and let the whole mixture simmer the rest of the day. You’ll probably need to break down the carcass a little after the roasting is over, in order to cover it with liquid as efficiently as possible.
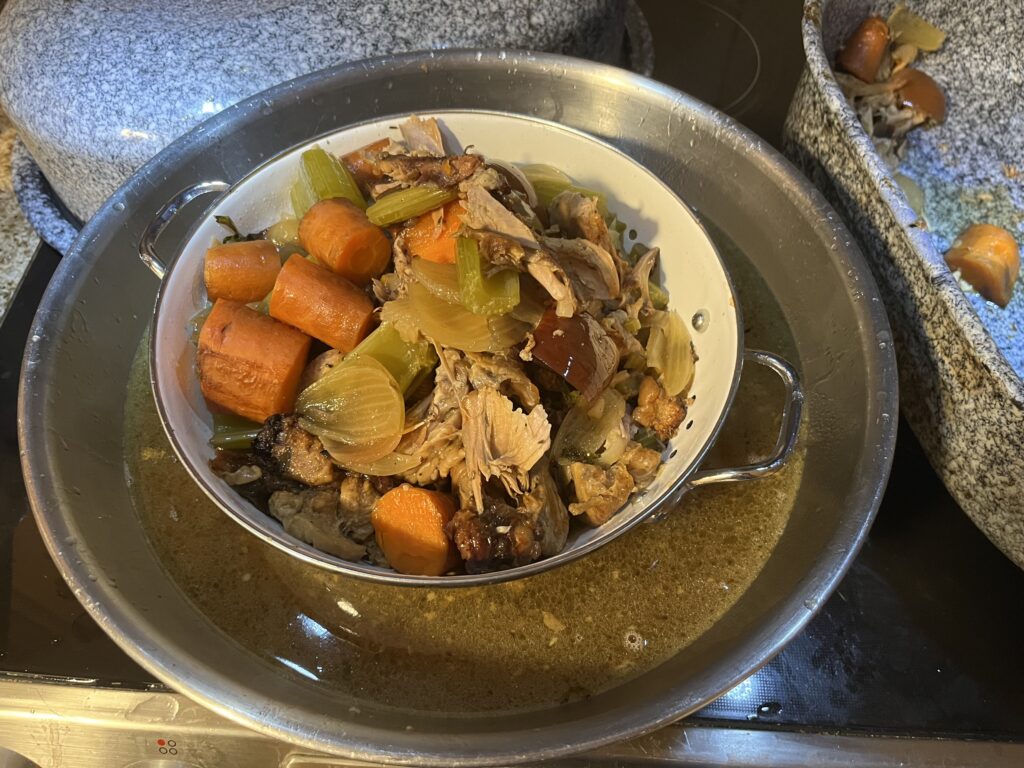
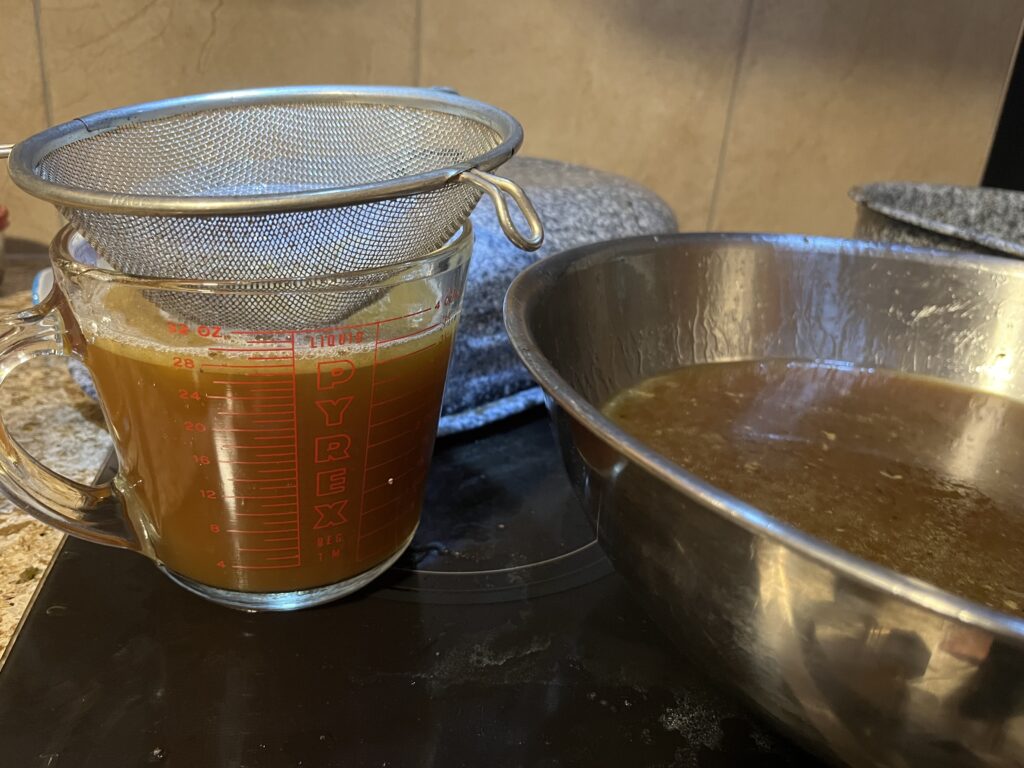
When the stock is ready, you’ll need to extract it from all the chunks of bone and vegetables. You have a few options, ranging from slotted spoons and tongs to colanders to sieves. I usually use all of those options, in that order, picking and choosing as I go in order to minimize splashing and avoid losing too much of the good stuff!
Step 5: Store the stock
I usually get lots of stock out of this process, and I freeze it in 1, 2, or 4 cup portions in clearly labeled freezer bags. I recommend freezing the bags flat on a cookie sheet. This way, they will freeze with the soup distributed evenly in them, making it much easier to defrost them when you want them. It also helps keep your freeze organized!
If you’re freezing many bags at once, use multiple cookie sheets and/or place some paper towel, wax paper, or parchment paper between the layers to ensure the bags don’t stick to each other.
Homemade turkey stock
Ingredients:
- One turkey carcass, as fully carved as you can manage
- 3 carrots, roughly chopped
- 3 celery stalks, roughly chopped
- 5 garlic cloves, crushed but not chopped
- 1 or 2 yellow onions, roughly chopped
- Water to cover
- Sachet of herbs of your choice
Instructions:
- Preheat the oven to 450.
- Prepare vegetables roughly while the oven is preheating. You don’t have to peel the carrot, and I usually throw the onion skin in too. I figure it will just add some colour.
- Roast the carcass with all the vegetables in a large roasting pan for 45-60 minutes.
- Break the bones up a bit to help the carcass sit more evenly and lower in the pan. This should be pretty easy now that you’ve re-roasted it.
- Cover the carcass with water (break some more bones if needed to make this easier). You can add some wine or beer, too, if you like. Add the spice sachet and bring to a simmer over medium heat.
- Turn down the heat and simmer 8-12 hours.
- Use a slotted spoon or tongs to remove the large pieces from the pan, then strain the remaining liquid through a mine mesh sieve. You can also use a colander in a very large bowl, just be very mindful of splashing.
- Use immediately in soup, or store in air-tight containers in the fridge for a few days or the freezer for a couple of months.
Notes:
You can try this with any animal carcass. Individual chickens don’t make a lot of stock compared to a turkey, but if you’re home for the day it’s low-effort enough that I’d say it’s worth it! If you try something other than poultry, I’d love to hear how it goes.
Do you sometimes come across recipes that ask for a tbsp or two of stock? A great way to handle that is to freeze homemade stock in small portions using an ice cube tray. Just be sure to label them clearly when you store them – nobody wants a stock cube in their lemonade!